Showing posts with label techniques. Show all posts

Wednesday, November 10, 2010

Quick and Easy Recipe: Chick'n Parmeshaun

This is another one of those things that I never really thought about posting, because it seemed too basic, or something.

We had a vegetarian house guest for a couple of months this summer, and I made this, which impressed our guest, who had only eaten Boca Chick'n patties in sandwiches, and never much thought about different ways to use them before. I also had an (omni) friend over for dinner after work one night recently, and I threw together this meal, which surprised her with its flavor and texture.

It's obviously not going to fool anyone into thinking they're having real chicken parmesean, but it does hit the same notes in a satisfying and much lower fat, not to mention super quick and easy, way. It's a nice, quick meal, although it's pretty much all prepackaged items, so it's not the freshest, or the least refined thing around. It's easy to keep the items on hand for the days when time is short.

For a 15-minutes-or-less meal of Chick'n Parmeshaun:

Boca Chick'n patties, one per person,
good pasta sauce, see note
FYH, Monterey Jack flavor
dried pasta, whichever shape you like most, I like penne
fresh green veggies like broccoli, sugar snap peas, asparagus, etc.

1) Turn on broiler if using FYH.

2) Put a 3 qt. saucepan full of water on to boil.

3) Place Boca Chick'n patties on a baking sheet, with 2--3" between each.

4) Pour sauce, as desired, over each patty. I typically use about 1/4 cup for each patty.

5) Crumble and sprinkle FYH over each patty.

Like this.

6) Place in oven or toaster oven for approximately 10 minutes, until patty is thawed and warm, and FYH is dark and melty.

Like this.
7) Meanwhile, blanch your choice of veggies in water as soon as it comes to a rolling boil. My veggie of choice for this meal is always broccoli.

8) Remove veggies from water when they are tender crisp. Add salt to water and let water return to boil.

9) Add pasta to boiling water and cook until al dente.

10) Dress your pasta. I usually add a dab of EB or a drizzle of olive oil, then a good sprinkle of nutritional yeast and garlic powder(fresh garlic is too strong), but sometimes I mix it up and keep the pasta plain with a drizzle of olive oil or EB, or heat some pasta sauce up and cook the pasta in the sauce for a few minutes.

11) Serve chick'n patty over dressed pasta, with a big side of cooked vegetables.

Notes
You can make a fresh green salad, sauté your vegetables, or cook something like kale in a separate pot, and omit step 7.

I love FYH, but if you're a diehard Daiya fan, or can't get enough Teese, you can use those. I've never tried them in this dish, so I don't know how long they would take, or if they would need the broiler.

This meal is all about convenience, so I use jarred pasta sauce. If you've got a stock of home canned sauce, or a freezer full of frozen sauce, I'm sure those would be amazing.

If not, look for pasta sauces that don't have sugar listed as an ingredient. The difference between sauces with and without this one ingredient is typically about 40 calories, not to mention a ton of flavor. The sugar tempers down all the yummy tanginess of the tomatoes and the subtleties of the other ingredients, so all you taste is sweet. Gross. I cannot stand super sweet marinara.

My favorite, widely available sauce is Classico's Tomato and Basil. It comes in both conventional, approximately $2, and organic, usually $3.50 or less. One serving is 1/2 cup and contains 50 calories. Classico's Tomato and Sweet Basil, on the other hand, is similarly priced(though I'm not sure if it's available in an organic version) DOES contain sugar, and one 1/2 cup serving is 90 calories. I'm not a fanatic about calorie counting, but this is a crazy big difference. It's always good to read labels to check out more than just the vegan-ness of ingredients.

I like making one extra patty and taking the leftovers for lunch. It travels super well, and it takes no more effort to make 1 or 2, than it does to make 3 or 4. The FYH will not remelt unless you broil it again, though....but I enjoy the once-melted texture.

Friday, November 5, 2010

Mini Poke Cakes


Day 5 of Vegan MoFo 2010! There are so many great blogs I never would have found on my own, and so many enthusiastic and creative vegans, I love this month. Ijust wish I had more time!

Do you remember poke cakes? My mother loved them with I was little. All you needed was a boxed cake mix and a box of gelatin, and you could a cake that looked like it had technicolor stalagmites. It really was kind of cool.

Yesterday, after decorating my mini Devo cakes, and realizing my concept was not working out, I thought of another way to use the raspberry syrup I had made with the lemon cupcakes. Mini vegan poke cakes!

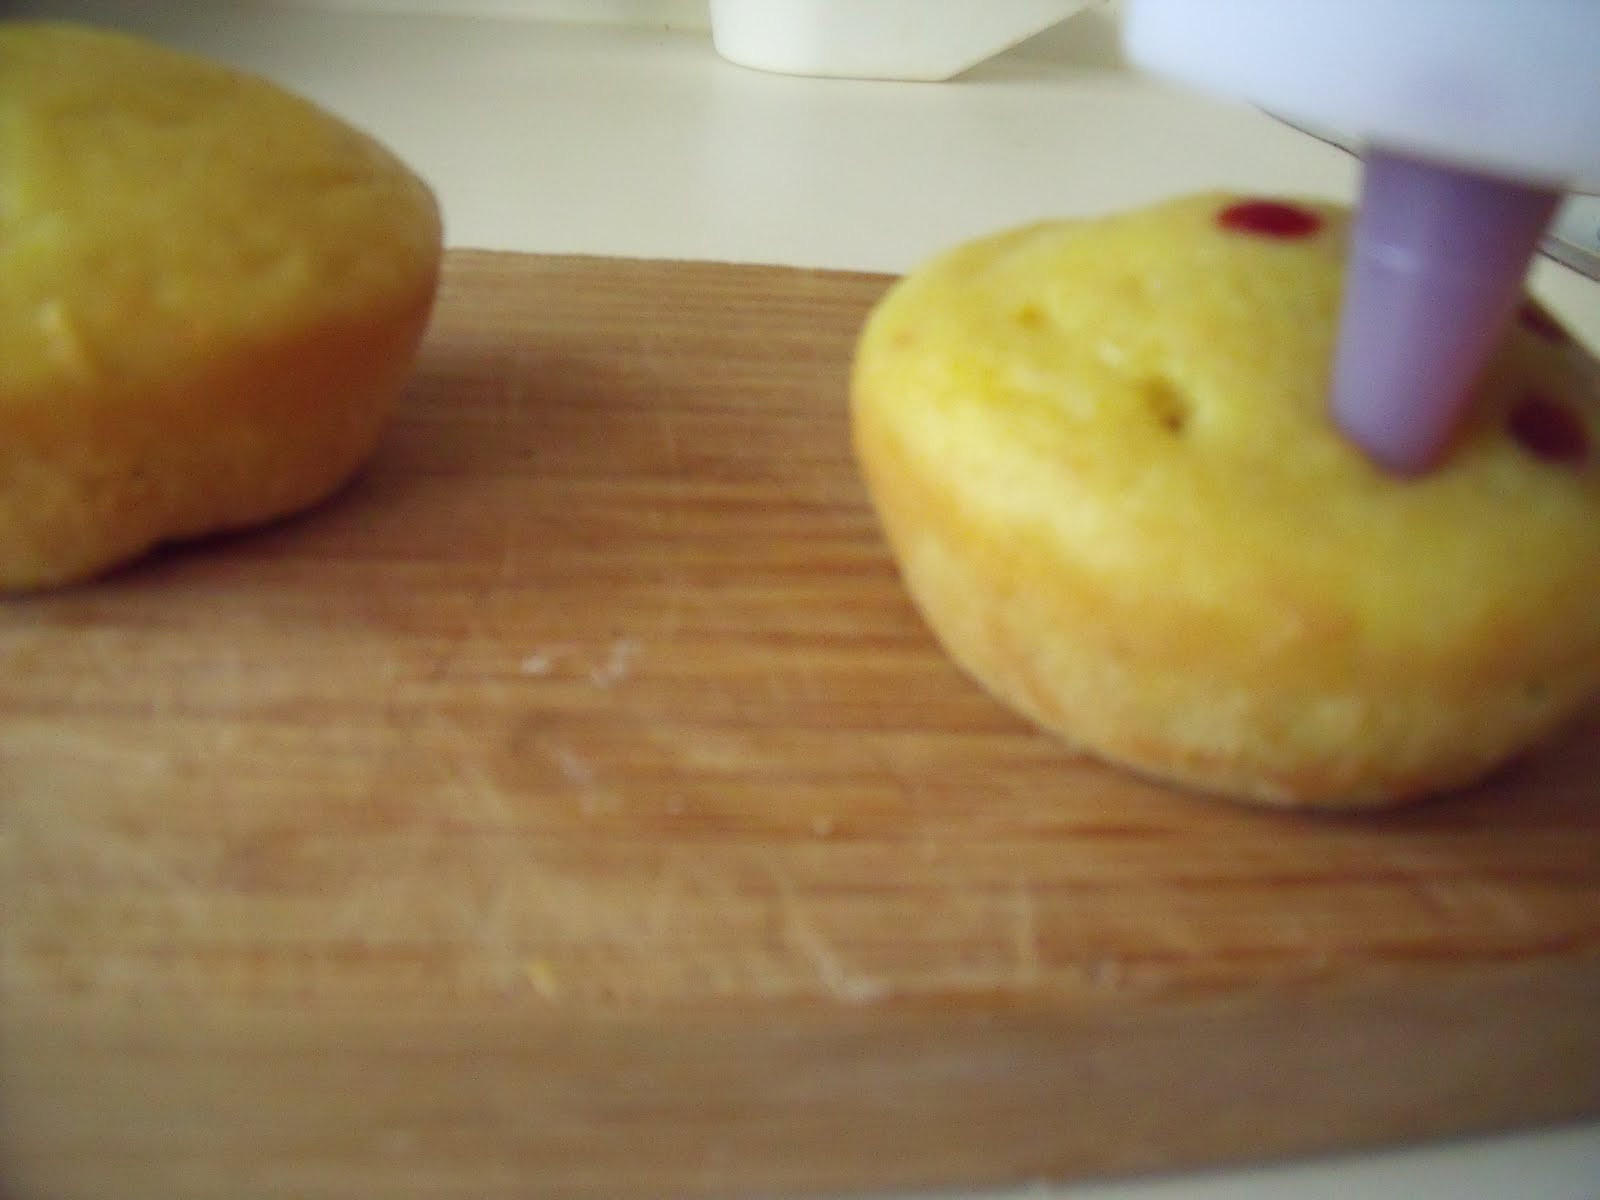
This is a pretty simple concept, you just need a syrup or strained jam, a squeezable container like an agave nectar bottle, a chopstick, and unfrosted cupcakes and icing.

Start by using the chopstick to poke holes into your cupcake. I would recommend starting with a test cupcake, just to see how far in you should go, how much syrup or jam you can use, and how many holes you need. Basically, if you push too deep, you'll ruin it by having syrup run right out, and if you put too many holes, everything will run out in a big syrupy mess when someone bites into it.

Next, fill your squeezable bottle with the syrup or jam of your choice. Insert the tip into the cupcake, and gently squeeze some syrup into each hole. If you spill, use a clean dish towel or a paper towel to wipe away excess, because icing will slid off if the top is too slick.


Once you're done filling all of the poke, frost away!


Admire and enjoy your mini vegan poke cakes!


I know there's not much icing on these cupcakes, I like a high cake to frosting ratio.

Thursday, October 28, 2010

Zesty Lemon Asparagus

Vegan MoFo is almost upon us and I'm going to give it another go, so I thought I'd post to get back into the swing of things.

A lot of times, I make dishes but don't post about them because they don't really seem like recipes. This is pretty simple, and is almost more of a series of small techniques. Which I guess is what recipes are, hence, here's a recipe!

I love asparagus, it tastes kind of like a delicate, more tender version of broccoli stalks to me. Recently, Newflower has been having it on sale, and I've been eating a ton of it. I love it sautéed, blanched, after it's been dipped in tempura and wrapped in rice and nori, as sushi, and a hundred other ways, but my favorite way to prepare it is like this:


Looks pretty good, right? It tastes even better!

Zesty Lemon Asparagus
by Christina Terriquez

Ingredients
1 organic lemon
2 tablespoons whole almonds or hazelnuts
1 tablespoon olive oil
1-2 cups asparagus
sea salt to taste

Directions
Prep your asparagus by breaking the ends. Take the tip in one hand and bottom end in the other, and gently bend, until asparagus stalk breaks. Discard the hard, white end. I like to cut my asparagus into 3 inch pieces for this dish, but you can leave it whole, or cut it into 2 inch pieces if you wish.

Zest the organic lemon, then juice it. Set both the juice and zest aside for now.

Carefully slice the almonds or hazelnuts into thin slivers.

Heat a medium sized cast iron skillet over medium high heat. Add olive oil and slivered nuts to pan and lightly toast. Once nuts have browned just a bit, add the asparagus and a pinch of salt to the pan and sauté until tender-crisp, about 2 minutes. Turn off heat and add a big pinch of zest and taste. Add lemon juice, lemon zest and sea salt to your taste.

Notes
You can buy almonds already slivered instead of slicing them yourself, but they usually cost more.

I think the hazelnuts taste a little bit better, but I don't always have them on hand.

I usually use 1--1 1/2 cups of asparagus, and the juice and zest of 1/2 a medium sized lemon, but depending on the rest of your meal, and your tastes, you can adjust it accordingly.

I hope that got you in the mood for some stellar vegan posts from tons of new and old vegans. There are already over 430 people signed up for Vegan MoFo 2010, from at least 15 countries.

Thursday, February 12, 2009

Valentine's Day Events and Love Bites

Okay, I'm pretty busy keeping a lot of balls in the air right now, but I'm so proud of this gluten-free cake recipe that's so moist and delicious you can serve it to anyone and they'll ask for another slice, and these Love Bites which are as ubiquitous in my house around Valentine's Day as bunnies and chocolate eggs are for Easter or flags and grilling are for Independence Day. They're the definitive sign that Valentine's Day is upon us. So I'm reposting the recipe for you to enjoy.


Or, if you're in Austin, you could save the baking for another day and come out and buy a few Love Bites from The Natural Epicurean's 5th Annual Bake Sale. I'm leading the baking this year, and I planned the menu as well as created most of the recipes. We'll have three different kinds of Love Bites, including a chocolate mint mousse version, Cheesecake with Chocolate Hazelnut sauce, Blood Orange Coulis, Blackberry Coulis and Pineapple Ginger Coulis, and Hello Dolly Bites, all of which will be vegan, gluten free, and free of refined sugar, plus Carrot Cake Cupcakes with Cashew Créme Cheese Icing, Baklava, and Spanakopita, which will be vegan and free of refined sugar. Some of our items will also be soy free. The bake sale will be on the Casa de Luz Campus at 1701 Toomey Rd., Saturday, February 14, 10:00 am - 2:00 pm or until we sell out.

I won't be able to attend the whole bake sale, though, as I'll be teaching a the Annual Aphrodisiacs: Cook to Love, Love to Cook class, where Rachel Zierzow and I will be making showing how to make a luscious and seasonal meal of: Artichokes with Lemon Butter, Porcini Mushroom Soup with Chestnuts, Tempeh Italiano and Toasted Pine Nuts over Seasonal Greens, Risotto Milanese, Maple Roasted Winter Squash with Apples and Fennel, Chocolate Amaretto Mousse with Almond Tuile and Kumquats.

The class is Saturday, February 14th, 9:00 am - 12:00 pm at Casa de Luz in the Cielo Room, and the cost is $55.00 for a single attendee and only $27.50 for a friend or family member who enrolls and attends with you. Per couple, it is $82.50. To register, please call (512) 476-2276.

Love Bites
Christina Terriquez

Yields: 20 servings

Valentine’s Day is a perfect special occasion to indulge in something really decadent with your loved ones. However, one of the biggest problems with indulging is the indigestion and feeling of heaviness that accompanies most baked goods. Nothing ruins romance like an upset stomach or feeling bloated and too-full.

These Love Bites are gluten-free for easy digestion. They have a complex yet classic combination of flavors which is rich and satisfying, yet their petite size makes them a perfect end to your meal, that won’t leave you or your sweetheart’s tummies feeling overstuffed.

Ingredients
1 recipe Gluten-Free Chocolate Cake
1 recipe Crème Anglaise for garnishing, optional

1/4 cup organic juice sweetened raspberry preserves, diluted
with 1 or 2 teaspoons of water

3/4 cup organic unsweetened non dairy milk, like soy, oat,
coconut, almond, rice, etc.
1/2 cup chocolate chips*

organic fresh raspberries for garnishing, optional

Directions
Prepare Gluten-Free Chocolate Cake and Crème Anglaise according to recipes.

Place chocolate chips in a heatproof bowl. In a saucepan, heat soymilk over medium-high heat until soymilk just begins to boil. Pour hot soymilk over chocolate chips and let stand for two minutes. Whisk soymilk and chocolate together until a smooth homogeneous texture is achieved.

To assemble Love Bites:
Place a wire cooling rack over a cookie sheet.

Cut off any crisp or tough edges of Gluten-Free Chocolate Cake and set aside for other uses. Cut remaining cake into individual servings using a small heart cookie cutter, or cut into 1 inch squares. If using a cookie cutter, make sure it is no more than 2 inches by 2 inches.

Cut heart in half, so that you have doubled the amount of hearts.

Spread 1/4–1/2 teaspoon of thinned raspberry preserves over the top of half of the hearts, then place another heart on top, creating a sandwich.

Place heart sandwiches on a wire rack/cookie sheet set up. Slowly pour chocolate sauce over each heart, allowing some chocolate to flow down the sides of each heart If chocolate has thickened, heat it or whisk in a tablespoon or two of more nondairy milk. Decorate hearts with raspberries while chocolate is still soft, if desired.


Place chilled and whipped Crème Anglaise in a small plastic bag and cut the very tip of one corner off the bag. Use the bag to gently drizzle crème over each heart.

Allow chocolate and crème to set up. Share with your loved ones.

Notes
*
If you are not gluten free, you can use grain-sweetened chocolate chips. If you are gluten free, but not avoiding sugar, you can use gluten-free chocolate chips. If you are avoiding both refined sugar and gluten, you can use unsweetened chocolate chopped into small chunks and sweetened to taste with agave nectar.

Variations
Try using a different flavor of preserves or Cashew Crème.

Substitute your favorite cake recipe for the Gluten-Free Chocolate Cake.

Add 1/4 teaspoon of almond extract to soymilk before boiling.


Gluten-Free Chocolate Cake
Christina Terriquez

Yields: 9–16 servings

1/3 cup organic quinoa flour
1/4 cup organic chick pea flour
1/4 cup organic white rice flour
1/3 cup organic, free-trade cocoa powder
1 teaspoon baking powder
1/2 teaspoon baking soda
1/4 teaspoon organic ground cinnamon, optional
1/4 cup organic safflower oil
5/8 cup organic unsweetened soy milk or coconut milk (1/2 cup
plus 2 tablespoons)
1 1/2 teaspoons organic white wine vinegar
1/2 cup organic agave nectar
1/8 teaspoon unrefined sea salt, Lima or SI brand recommended
1 tablespoon organic ground flax meal
1/4 cup filtered or spring water
1/2 teaspoon organic vanilla extract
1/8 teaspoon organic almond extract, optional

Directions
Preheat over to 350° F.

Prepare one 8 inch square cake pan by lightly brushing with safflower oil, then lining with an 8x16 inch piece of unbleached parchment. Set aside.

In a medium sized bowl, sift flours, cocoa powder, baking powder, baking soda, and cinnamon together.

In a large bowl, mix remaining ingredients together. Add dry ingredients and gently mix to incorporate.

Pour into prepared pan and bake for 30–50 minutes, until a toothpick comes out clean.

Allow cake to cool completely on cooling rack. Run a knife along the edges of the cake, and use long ends of parchment to gently remove cake from baking pan.

Variations
Double this recipe for a two–layer 8 inch square cake.

Frost with Creamy Chocolate frosting, chocolate ganache, Tofu Cream Icing, Cashew Creme, or serve with Orange Blossom Syrup.

Garnish with a fruit sauce made with fruit sweetened preserves diluted in apple juice or water and thickened with kuzu.

Crème Anglaise
Christina Terriquez

3/4 cup organic unsweetened soymilk
2 tablespoons agar flakes
1 organic vanilla bean
1/3 cup organic coconut milk
1/4 cup organic light agave nectar
1/4 cup organic amasake
1 tablespoon organic vanilla extract
1 tablespoon organic coconut oil, optional

Directions
In a medium saucepan, combine soy milk and agar flakes and let rest for 10 minutes.

While agar and soymilk are resting, split vanilla bean in half lengthwise. Scrape the tiny black seeds from each half, and put vanilla seeds and pod into soymilk.

Add remaining ingredients to saucepan and simmer for 10–15 minutes, until agar flakes have dissolved and sauce has thickened slightly. Remove vanilla pod from sauce. Remove from heat and blend in blender or with immersion wand once again. Use immediately for glazing.

If using sauce for garnishing, cool until set. After sauce has set, purée in blender or with immersion wand. Sauce should be soft custard consistency.

Notes
Crème Anglaise is usually made with cream, refined sugar, egg yolks and vanilla beans. This vegan version is much healthier for your heart.

Store it in a squeeze bottle (this is a perfect use for your agave nectar bottles when you've used all the agave inside), and use it to garnish any other desserts you make that week.

Make a double or triple batch and put it in an ice cream maker for a rich, French Vanilla-style ice cream.

Thursday, November 20, 2008

Guide to a Vegan Vanguard Thanksgiving, Part 2

What Do I Eat, Now That Turkey's Off The Menu?

I remember the panic of my first Thanksgiving. I had been a perfectly content vegetarian for about 4 months, and while I had experienced my share of food disasters, for the most part, I was having a lot of fun learning about nutrition and trying out new foods. Then, a few days before Thanksgiving, something occurred to me: for the first time in my life, I wouldn't be able to join in the family traditions. I wouldn't be eating the turkey, or the gravy, or the giblet stuffing, and I definitely wouldn't be making my family's annual Thanksgiving Jell-o. As I was only 14 at the time, this was a big moment for me, and I suddenly felt extremely alienated and isolated. Not because I wouldn't be eating turkey, but because I would be breaking one of the few traditions we observed, and I would be the only one doing so. I thought that I would be left out. As it turns out, my mother was great, and set aside stuffing for me without giblets, and the other dishes that couldn't be converted were things I didn't really care for anyway, so I was able to be part of the family and share most of the meal.

What did I eat instead of turkey for my first vegetarian Thanksgiving? I actually don't recall. I think it was some savory tofu dish that seemed daunting at the time, and ended up tasting okay but was generally underwhelming. The point is, the food itself didn't really matter, having my family make an effort on my part was enough to allow me to realize I could never not be a part of the family, and see how loved and accepted I was. I do know that for Christmas that year, and for the all of the Thanksgivings since that I've spent with them, my parents bought me a Tofurky. A whole Tofurky. Just for me. I've always appreciated the sentiment, even if I didn't really enjoy the entrée itself....I rag on it a bit, but it does make things easy, and I know many people who enjoy it immensely.

I actually was never a big fan of turkey on Thanksgiving because it usually came out kind of dry and wasn't particularly flavorful, which may account for why I don't miss turkey and don't care for Tofurky roasts. Give me a variety of delicious side dishes, or even just a plate of dressing and cranberry sauce, and I could be totally happy. I do enjoy the ritual of cooking for days, having a big production leading up to the main event, and then the delicious sedated afterglow, though. Plus, JD, my love, has a healthy appreciation for tradition, so we do a full spread, and we do it right.

I've been away from my family for 6 years now, so I've had some time to work on my Thanksgiving dishes, and I've done many different things for the vegan entrée at my Thanksgiving celebrations. For a few years, I made a simple harvest bake by mixing fall vegetables like celery, onions, sweet potatoes, potatoes, carrots, and parsnips in a casserole dish with tempeh or seitan, seasoned it all with soy sauce, garlic, herbs, and wine if I wanted, and baked until everything was tender. I've also made yummy but not especially festive protein dishes like tempeh marsala. Last year I tried making a tofu and gluten mock turkey, but it was terrible. I generally enjoy foods more when they're not trying to mimic something exactly, so I should have known better.

I usually try to do something a little different each Thanksgiving. Here's a recap of last year's Thanksgiving feast. I haven't finalized this year's menu yet, and there are over 20 recipes in contention, including chocolate bourbon pie, cranberry sorbet, cranberry, currant and champagne relish, cranberry upside down cake --yes, I have lots of love for fresh cranberries--and yuba holiday "duck". I do know we'll definitely be making the Cranberry, Fig, and Walnut Cornbread Dressing and Spiced and Caramelized Butternut Squash from last year's menu as well as traditional favorites like mashed potatoes.

Many blogs have compiled great recipes and ideas, some of my favorites include:

Vegan Bits - The link will take you directly to a compilation of holiday recipes, but check out the more recent posts for more Thanksgiving info.

PETA's VegCooking - Tons of recipes, most of which look like they were tailor-made for home cooks with limited time.

Bryanna Clark Grogan
- The vegan food mogul and author offers up recipes for some of the most common holiday dishes. Great info, ideas, and recipes for soy-free vegans.

Karina's Kitchen - Anyone with gluten or wheat allergies will understand why Karina is a Gluten Free Goddess. While it's not a vegetarian or vegan blog, Karina does make sure her vegan readers have plenty of gorgeous recipes to try. In her pre-Thanksgiving post she includes tons of dishes that everyone can enjoy, just make sure click on any recipe that sounds inviting, as many of Karina's recipes have tips or variations for vegans.

101 Cookbooks - Heidi's compiled and organized all of her vegan Thanksgiving recipes, so you don't have to search. She's even separated all of the vegetarian Thanksgiving recipes on another page so everything is simple and easy for her readers. I love Heidi's style because it's simple, elegant, beautiful, and everything starts with quality ingredients.

Unturkey
- Do you remember Now and Zen's UnTurkey? So do the vegans who created this site. They've opensourced the recipe, so you can recreate it in your home.

Finally, there's Field Roast - many people serve the Celebration Roast version, but I'm partial to the Hazelnut Herb Cutlet. The official website also offers recipes.

Up next: Guide to a Vegan Vanguard Thanksgiving, Part 3 - Where Can a Vegan in Austin Go to Get Their Thanksgiving Grub On?

Wednesday, November 19, 2008

Guide to a Vegan Vanguard Thanksgiving, Part 1

How to Have a Thanksgiving with Less Stress and More Quality Time

Thanksgiving is almost upon us. For most people, this is a day of family, food, and hopefully, love and community--but for some vegans and vegetarians, especially new vegans or vegetarians and their families, Thanksgiving can be especially stressful. Here are some things I've picked up over the years:

If you're around all of your family for the first time since making a huge lifestyle change, your family is bound to be curious. Some people handle their curiosity better than others, but be prepared to play 20 questions with each and every one of your relatives. I've experienced everything from family members who sneakily fed me dip loaded with bacon grease, to cousins who went out of their way to make sure I had something I would eat, to my immediate family who have always been supportive. I've had people try to serve me butter and eggs, or ask if chicken and fish are okay. I've even had family members assume my veganism was a result of my (Catholic) high school brainwashing me. Remember that when your family voices concerns, they do so because they love you. Gently inform them your beliefs, and, if they persist, agree to disagree. Remember, you're not going to change everyone's mind all at once, and getting in someone's face, being beligerent, etc. only gives vegans a bad name while doing nothing to further the cause, and ultimately, Thanksgiving is a day for family, friends, and gratitude.

Nothing makes people understand veganism like amazing vegan food, so, if possible, take an amazing vegan dessert to share with everyone. If you can, help prepare the whole dinner. Not only is this great bonding time, but you can try to convert some of the dishes and make them vegan. This can be especially helpful for your hosts who want to accommodate you, but are unsure of what exactly is and isn't in your diet. Some dishes can be easily converted with no loss of flavor, using everyday ingredients available at most stores. For example,you can make vegan dressing/stuffing (use vegetable stock and bake in a dish instead of stuffing the turkey), or vegan mashed potatoes (use Earth Balance or olive oil instead of butter, and soy milk instead of milk). Make sure to pay special attention to the presentation of anything vegan you serve, because your food will be judged. I used to find it helpful to wait until after people had started eating and enjoying a dish before mentioning that it was vegan--although now everyone I know is well aware that I'm vegan.

If you know nothing will be vegan, or are unsure if there will be anything for you to eat, eat ahead of time and/or take a dish you love, to share with others. This is a good general tip for vegans at any event, and it makes any food you find that's accidentally vegan, a happy surprise!

Instead of obsessing about food, relax and enjoy the company. This a good general tip for everyone in any situation. In my experience, it does the most to promote veganism because it shows that vegans can be well-adjusted and social, and that veganism can be easy and fun. In college, both of my roommates became vegetarians after living with me, and they each said something along the lines of, "You showed me it didn't have to be hard (to give up meat)".

On the flip side, don't act like a vegan martyr. By that, I mean the modern common usage of martyr, i.e. someone who is constantly suffering. Being a vegan is a choice made freely, and it's something to be happy about. If you feel deprived or angry about it, you're doing it wrong. Additionally, no one wants to hang out with someone who is down about everything. A few years ago, one of my best (omni) friends, J, met a cute vegan girl and wanted to take her out, but they couldn't get their schedules to align until one night when J was going out to a steakhouse with his friends for a birthday party. The girl repeatedly said she didn't mind going to the steakhouse, and they wanted to hang out with each other sooner rather than later, so the plans were set. As soon as they stepped inside of the steakhouse, the girl loudly declared, "It smells like death in here," and proceeded to make snide comments all evening. Did anyone have a good time that night? Of course not. I'm not saying you should stay mum if you're uncomfortable, but I know I would like to eat without having to defend my choices, and I'm sure my dining companions feel the same way. Since we respect each other, even if we disagree, we can enjoy spending time together.

Up next: Guide to a Vegan Vanguard Thanksgiving, Part 2 - What Do I Eat, Now That Turkey's Off The Menu?

Tuesday, February 12, 2008

Valentine's Day Love Bites


Valentine’s Day is a perfect special occasion to indulge in something really decadent with your loved ones. However, one of the biggest problems with indulging is the indigestion and feeling of heaviness that accompanies most baked goods. Nothing ruins romance like an upset stomach or feeling bloated and too-full.

These Love Bites are gluten-free for easy digestion. They have a complex yet classic combination of flavors which is rich and satisfying, yet their petite size makes them a perfect end to your meal, that won’t leave you or your sweetheart’s tummies feeling overstuffed.

Love Bites
Christina Terriquez

Yields: 20 servings

1 recipe Gluten-Free Chocolate Cake
1 recipe Crème Anglaise for garnishing, optional

1/4 cup organic juice sweetened raspberry preserves, diluted
with 1 or 2 teaspoons of water

3/4 cup organic unsweetened non dairy milk, like soy, oat,
coconut, almond, rice, etc.
1/2 cup organic grain-sweetened chocolate chips

organic fresh raspberries for garnishing, optional

Directions
Prepare Gluten-Free Chocolate Cake and Crème Anglaise according to recipes.

Place chocolate chips in a heatproof bowl. In a saucepan, heat soymilk over medium-high heat until soymilk just begins to boil. Pour hot soymilk over chocolate chips and let stand for two minutes. Whisk soymilk and chocolate together until a smooth homogeneous texture is achieved.

To assemble Love Bites:
Place a wire cooling rack over a cookie sheet.

Cut off any crisp or tough edges of Gluten-Free Chocolate Cake and set aside for other uses. Cut remaining cake into individual servings using a small heart cookie cutter, or cut into 1 inch squares. If using a cookie cutter, make sure it is no more than 2 inches by 2 inches.

Cut heart in half, so that you have doubled the amount of hearts.

Spread 1/4–1/2 teaspoon of thinned raspberry preserves over the top of half of the hearts, then place another heart on top, creating a sandwich.

Place heart sandwiches on a wire rack/cookie sheet set up. Slowly pour chocolate sauce over each heart, allowing some chocolate to flow down the sides of each heart If chocolate has thickened, heat it or whisk in a tablespoon or two of more nondairy milk. Decorate hearts with raspberries while chocolate is still soft, if desired.


Place chilled and whipped Crème Anglaise in a small plastic bag and cut the very tip of one corner off the bag. Use the bag to gently drizzle crème over each heart.

Allow chocolate and crème to set up. Share with your loved ones.

Variations
Try using a different flavor of preserves or Cashew Crème.

Substitute your favorite cake recipe for the Gluten-Free Chocolate Cake.

Add 1/4 teaspoon of almond extract to soymilk before boiling.


Gluten-Free Chocolate Cake
Christina Terriquez

Yields: 9–16 servings

1/3 cup organic quinoa flour
1/4 cup organic chick pea flour
1/4 cup organic white rice flour
1/3 cup organic, free-trade cocoa powder
1 teaspoon baking powder
1/2 teaspoon baking soda
1/4 teaspoon organic ground cinnamon, optional
1/4 cup organic safflower oil
5/8 cup organic unsweetened soy milk or coconut milk (1/2 cup
plus 2 tablespoons)
1 1/2 teaspoons organic white wine vinegar
1/2 cup organic agave nectar
1/8 teaspoon unrefined sea salt, Lima or SI brand recommended
1 tablespoon organic ground flax meal
1/4 cup filtered or spring water
1/2 teaspoon organic vanilla extract
1/8 teaspoon organic almond extract, optional

Directions
Preheat over to 350° F.

Prepare one 8 inch square cake pan by lightly brushing with safflower oil, then lining with an 8x16 inch piece of unbleached parchment. Set aside.

In a medium sized bowl, sift flours, cocoa powder, baking powder, baking soda, and cinnamon together.

In a large bowl, mix remaining ingredients together. Add dry ingredients and gently mix to incorporate.

Pour into prepared pan and bake for 30–50 minutes, until a toothpick comes out clean.

Allow cake to cool completely on cooling rack. Run a knife along the edges of the cake, and use long ends of parchment to gently remove cake from baking pan.

Variations
Double this recipe for a two–layer 8 inch square cake.

Frost with Creamy Chocolate frosting, chocolate ganache, Tofu Cream Icing, Cashew Creme, or serve with Orange Blossom Syrup.

Garnish with a fruit sauce made with fruit sweetened preserves diluted in apple juice or water and thickened with kuzu.


Crème Anglaise
Christina Terriquez

3/4 cup organic unsweetened soymilk
2 tablespoons agar flakes
1 organic vanilla bean
1/3 cup organic coconut milk
1/4 cup organic light agave nectar
1/4 cup organic amasake
1 tablespoon organic vanilla extract
1 tablespoon organic coconut oil, optional

Directions
In a medium saucepan, combine soy milk and agar flakes and let rest for 10 minutes.

While agar and soymilk are resting, split vanilla bean in half lengthwise. Scrape the tiny black seeds from each half, and put vanilla seeds and pod into soymilk.

Add remaining ingredients to saucepan and simmer for 10–15 minutes, until agar flakes have dissolved and sauce has thickened slightly. Remove vanilla pod from sauce. Remove from heat and blend in blender or with immersion wand once again. Use immediately for glazing.

If using sauce for garnishing, cool until set. After sauce has set, purée in blender or with immersion wand. Sauce should be soft custard consistency.

Notes
Crème Anglaise is usually made with cream, refined sugar, egg yolks and vanilla beans. This vegan version is much healthier for your heart.

Store it in a squeeze bottle (this is a perfect use for your agave nectar bottles when you've used all the agave inside), and use it to garnish any other desserts you make that week.

Make a double or triple batch and put it in an ice cream maker for a rich, French Vanilla-style ice cream.

Wednesday, November 7, 2007

Chile Verde Enchiladas and Cold Weather Comfort Soup

I've got a confession to make.

I cheated.

I gave in to weakness and tried VeganRella. The worst part? It was delicious! It's not something I'll use often. I may, in fact, not buy it ever again... but it does indeed melt, and it melts better than Follow Your Heart Vegan Gourmet (my personal NotCheese of choice). The taste and texture right out the package leave much to be desired, as it is waxy and bland, and it contains canola oil (which I missed when I bought it) but for gooey meltiness it's probably the best commercially made vegan cheese alternative. The normally off-putting waxiness also comes in handy in this case, since it makes grating very easy. Of course, my minimally-refined, go-to ingredient for gooey deliciousness is usually mochi, and probably always will be, but sometimes it just doesn't work in a given dish.

One such dish is enchiladas. I had tried making a nightshade-free version with mochi and it just wasn't any good. The mochi filling was so rich and filling you could really only eat one, and you felt full and bloated for hours afterward. I may attempt another nightshade-free version with mochi, but if I do, the enchiladas would be filled with either beans or vegetables, and only the topping would contain mochi.

Yesterday I posted a recipe for green chile that I had been meaning to post for months; but it just so happened that we recently made a big batch, which we have been using in various dishes, and tonight we made green enchiladas, so it seemed like a very timely dish to post. I took a few really pretty pictures of the enchiladas and the soup and vegetables that I made, but apparently my camera ate the pictures (the food was that yummy!), so I'm left with one lone enchilada picture.

VeganRella and Mama C's Chile Verde Enchiladas
For this batch of green chile, we used about 6 Anaheim peppers, 4 poblanos, and 5 or 6 jalapeños. Using a mix like this really lets the most desirable aspects of each pepper shine through, in this case, the poblano don't have much flavor, but give a nice dark color contrast, and help temper the heat of the jalapeños. The tomatoes give a good tang and add bright red bursts of color. The Anaheim are slightly sweet and mild, give body to the chile, and provide a base. The jalapeños, of course, provide heat.

Enchiladas are another dish that is more about technique than ingredients. It's very important to have your filling and sauce ready. The fillings I associate most with enchiladas are cheese & onions, spiced ground beef, or beans, but the possibilities are endless. I used a simple filling of grated VeganRella (mozzarella flavor) and green chile. Making enchiladas is a great way to use leftovers, for example if you have tacos on Monday, you can use the leftovers as filling for enchiladas later in the week. Enchiladas are commonly made with a red chile sauce, often being tomato-based, but green chile sauces are not uncommon.

The basic process begins with lightly frying a corn tortilla in a touch of oil to soften. I think you could probably get away with heating the tortillas on a comal, skillet or griddle if they were fresh and flexible, though. Next, you fill the tortilla with your desired filling--I used approximately 2 tablespoons finely grated VeganRella and 2 teaspoons green chile per tortilla--and roll up. Place rolled tortilla in a baking dish, and repeat. This process is much easier if you have someone helping you, then you can fry while your helper fills, or vice versa. When you've either 1) used up all your ingredients, 2) run out of space in your baking dish, or 3) made 2 more enchiladas than you think will be enough to satisfy all members of your household, spread a generous amount of your desired chile sauce over and around each enchilada. You can even put a little sauce in the bottom of the baking dish prior to putting enchiladas in dish, but I haven't found that to be necessary. If desired, top with a sprinkle of your favorite notcheese. Bake at 350°F for about 20 minutes or until filling is heated through. If you're using a melty vegan notcheese, obviously, you're looking for it to melt. I like to smother the enchiladas with more chile halfway through cooking, but I don't think that's necessary unless they look a little dried out.

I also made a yummy stick-to-your-ribs soup, that just happened to be super easy and made almost entirely from leftovers. JD loves Campbell's-style vegetable beef soup, and I wanted to make a soup similar to that, but heartier and healthier. Recently, we've had a cold spell in Austin. Our temperature seems to be about 10 degrees cooler than usual, which means that I've had to wear long sleeves, pants, and real shoes as opposed to my normal casual November attire of knee-length skirts and flip flops. It also means that I've been craving more long-cooked, baked, or stewed foods and soups that are thicker, richer or more filling.

I've been playing with homemade vegetable stocks, and I saved some of the vegetables (I used carrots and celery), so I also had both of those items on hand. I also had cooked short grain brown rice, but you could use any leftover grain. I chose red lentils to thicken the soup and add heartiness, because red lentils, unlike most other varieties, turn to mush as they cook and change to a light yellow color, so you can't really see then in this soup. Certainly, other lentils could be used, but they wouldn't thicken the soup in the same way. If you have cooked whole beans like white or kidney on hand, they'd make a delicious addition.

Stick-To-Your-Ribs Comfort Soup
by Christina Terriquez

2 1/2 cups of your favorite broth
1-1 1/2 cups diced mixed vegetables (frozen, leftover or fresh)
2 tablespoons red lentils
1-2 cloves garlic, minced
1 cup of red sauce (Mama Mia sauce, nightshade-free red sauce, tomato sauce, or marinara)
1 1/2 cup cooked brown rice
your choice of dried herbs like oregano, basil, thyme, or Italian herb mix, etc.
sea salt or shoyu

Directions
In a medium saucepan or dutch oven, heat broth and add vegetables. If using fresh vegetables, simmer vegetables for 2 minutes. If using frozen vegetables, simmer for 10 minutes. If using leftover vegetables, proceed to next step.

Add red lentils and simmer for 10 minutes. Add garlic, red sauce, brown rice, and herbs and simmer for 15 minutes. Season to taste and simmer for 5 more minutes. Garnish with fresh scallions of parsley.

Notes
Add 1/2-1 cup whole cooked beans.

Try adding other leftover grains in place of brown rice.

Can be served as a meal with a piece of crusty bread, or in smaller portions as a starter.

When I put away the leftover soup, I took it as an opportunity to try taking another picture, so here you are:

Stick-To-Your-Ribs Comfort Soup
I especially like the way the hands sort of take on the form of a heart in this picture.

It seems like VeganMoFo is really helping spread the vegan food love among bloggers. I know I've personally found many new blogs which will become a part of my weekly reads, and it seems like I've possibly gained a few more readers. If you're a new reader, welcome! It's always nice to make a new acquaintance.